Contributing to the database
Registration
Contributions require to be signed-in and are made under the link "Contribution". To sign-in you the new user has first to register his e-mail address, a user-name and a password. The two latter are case sensitive and for example "tintin", "Tintin" or "tIntin" will be handled as three different names. After registration, an e-mail with an activation link will be send to the new user. After activation of his account, he will be able to sign-in. The login name will visible to other users. The password and e-mail address will remain hidden. Nevertheless, for security reasons, it is strongly discouraged to choose the same logging names and passwords for Pericopsis than the ones you use for your e-mail or banking accounts .
Defining an area of survey
Defining an area of survey is optional but useful. There are two main advantages for it. The first is that it permits you to rapidly find your area of interest and to share it with other users.
The second is that defined areas are tools that make it more easy for you to follow possible changes made by other contributors and to correct possible acts of vandalism. Areas of survey
are unique and linked to the login name. If you want to have more than one area, you need to register them under new login names. Recording an area of survey is strait forward:
a. On the contribution page, draw a polygon over your area of interest.
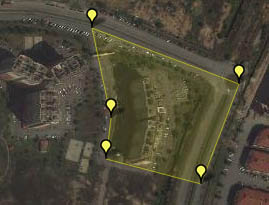
b. Click on the word "Polygon" and the buttons and will appear.
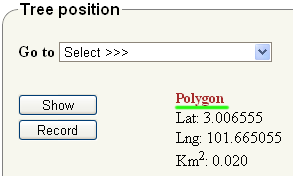
c. Click on to record your polygon and on to view it.
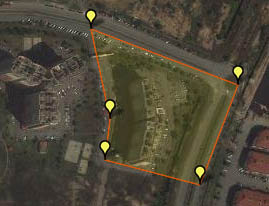
Similarly, polygons of other contributors can be displayed on the map if they are within the yellow selection polygon. It is suggested that polygons of the same size range should not overlap. A maximum of 30 polygons can be displayed at the same time. The name of the polygon owner appears by clicking on the red polygon. Recording a new polygon for the same user name will erase the previous.
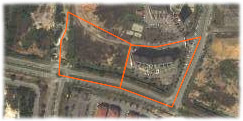
Example of the polygons of two users.
Recording a new tree
a. Finding the position on the map.
To record a new tree, press the button. The red symbol  needs to be paced on the desired position

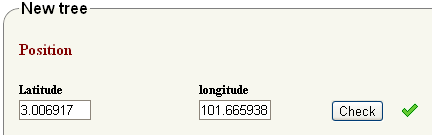
The red symbol can also be moved using GPS coordinates in the WGS 84 system. The display mode of latitude and longitude can be changed by clicking on "latitude" or "longitude". A query of existing trees within a yellow polygon drawn around the new tree position
is suggested to ensure the tree has not already been mapped. Once the red symbol is on the desired position and no other tree is on the same place, click on the button
and a green tick  should appear.
b. Giving a "Scientific" name.
Recording a tree requires to assign a scientific name. The form for scientific names is displayed by clicking on "Scientific name".
On the form, select a name level, enter the corresponding name and click on to verify if the name exists in the Pericopsis database. If yes
a green tick should appear. If a question mark appears you need first to enter your name in the database as shown in c.

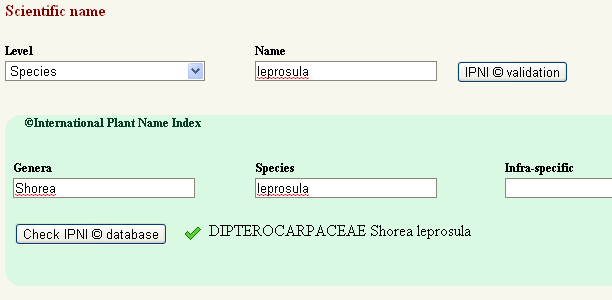
Checking if Acacia mangium is in the database.
c. Entering a new "scientific" name in the database.
Pericopsis is a Wiki and its database was empty at the origin. New scientific tree names need to be validated before being accepted.

In this example, Shorea leprosula is not in the pericopis database
If the name does not exists in the Pericopsis database, it needs to be validated using the ©International Plant Name Index (INPI) database that becomes accessible by clicking . In this case both genera and species names are required. Hereafter an example with Shorea leprosula
d. Validation of a new tree.
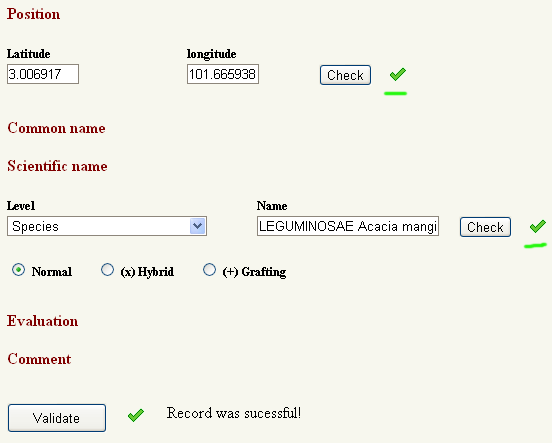
Valid tree name and position are confirmed by green ticks. The button can now be pressed. If the record was successful trees should be reloaded on the map to display it.
e. Using infraspecific names and cultivar.
Infraspecific names are handled on the same principle than the species name and validated by the IPNI database. Epithets subsp., var. and f. that distinguish respectively
subspecies varieties and forma are selected after a query on a infraspecific name without epithet has been done.
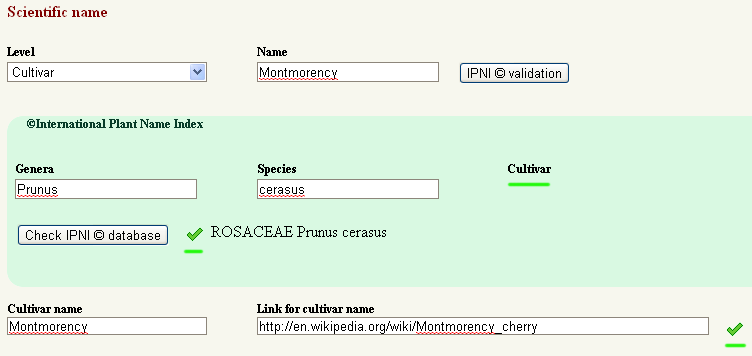
Cultivars or cultivated varieties are not following the system of botanical naming and are not available in the IPNI database. The form for cultivars appears after clicking on the word “Infra-specific” in the IPNI frame. New cultivars need to be entered with an internet link that gives some information about them.
The species and genera corresponding to the cultivar need to be validated again in the IPNI window even if they already exist in the Pericopsis database. An example is given hereafter for 'Montmorency', a cultivar of Prunus cerasus.
f. Dealing with hybrids of grafted chimeras.
If there is no botanical name for a hybrid, a second name can be associated by checking the radio button "(x) Hybrid" in the "Scientific name" form. The radio button "(+) Grafting" is used when the double name is related to a chimera.
g. Adding other features.
Other entries such as "Common name", "Evaluation" and "Comment", are optional. Clicking on the title shows and hides the corresponding forms. For the Diameter at breast height (DBH) value, the tree circumference instead of diameter can be entered after clicking on "Diameter at breast height (DBH)". Coments are limited to 300 words. The common names need to be associated to a country where they are in usage.
Editing existing trees
All attributes except tree positions can be edited. For editing, click .
Changes will only take in account the forms parts that have been checked . The tree to be edited should be selected on the map as a white marker  .
Changes are validated using . Successful validation is confirmed by a green tick and can be checked by reloading the trees on the map.
.
Changes are validated using . Successful validation is confirmed by a green tick and can be checked by reloading the trees on the map.
Editing permits also to remove cut trees by marking them as dead under "Evaluation" and to correct possible vandalism. Trees marked as dead will be automatically removed from the database after a few days.
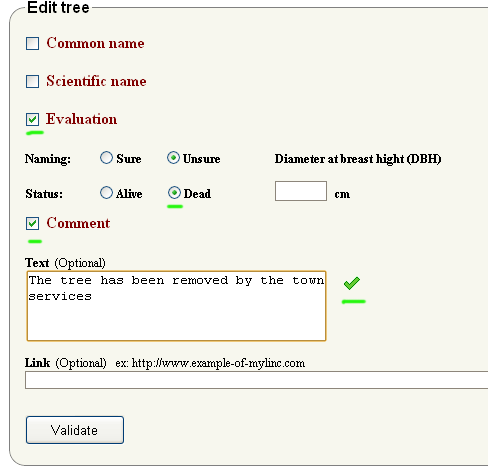
Example of editing a tree as dead with a comment.